

After my wife laid eyes on her friends 100%-wood combination bedroom bench/shoe rack, she knew what she wanted for Christmas. My friend and woodworking master Steve was behind the original design and creation, and I used his expertise and build pics to build one of my own.
SHOPPING LIST
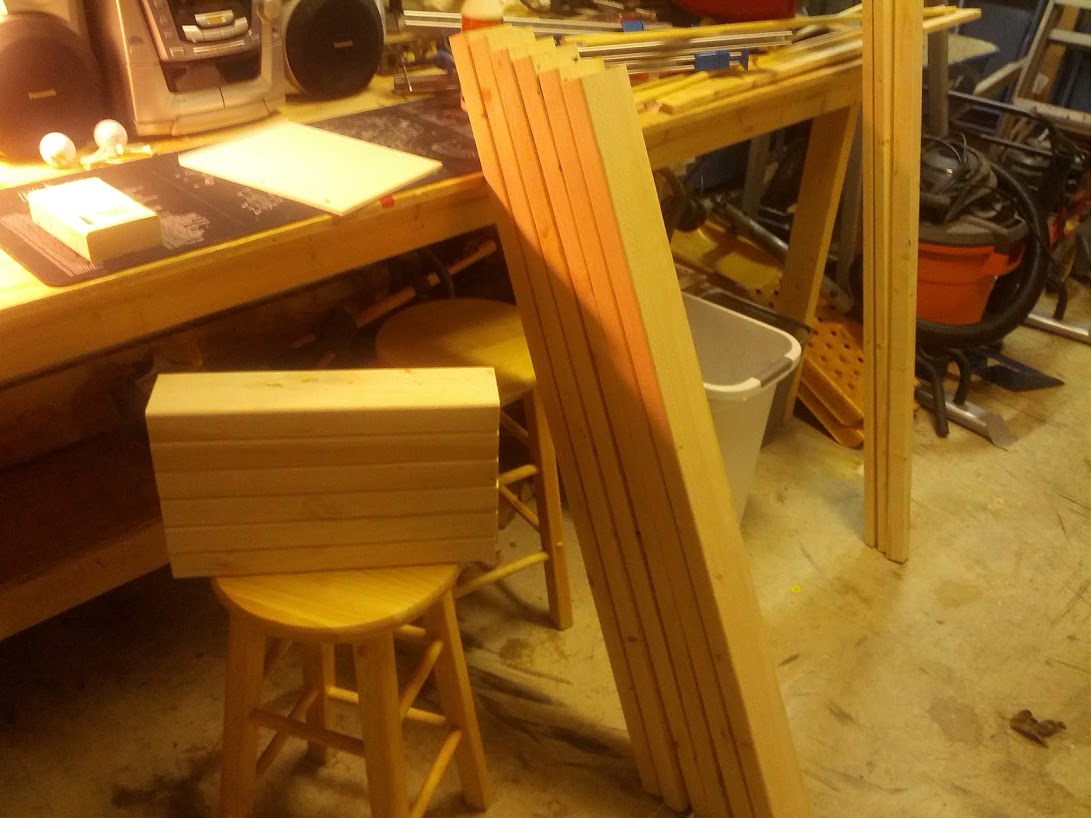
- 7x 2x4x96" whitewood studs - 6 of these will create the top and bottom of the bench, 1 will create the sides.
- 2x 1x4x96" hobby board - These will create the middle shelf.
- 1x 2x2x96" board - This will create the shelf supports. We only need ~21" of this, but the 96" board was the cheapest.
- 3x 48"x1/2" dowels - These will be how we connect the top, bottom and sides together. No screws! 100% wood.
- 1x 48"x1/4" dowel - This wil be used to connect the shelf (smaller since the shelf uses 1x4's).
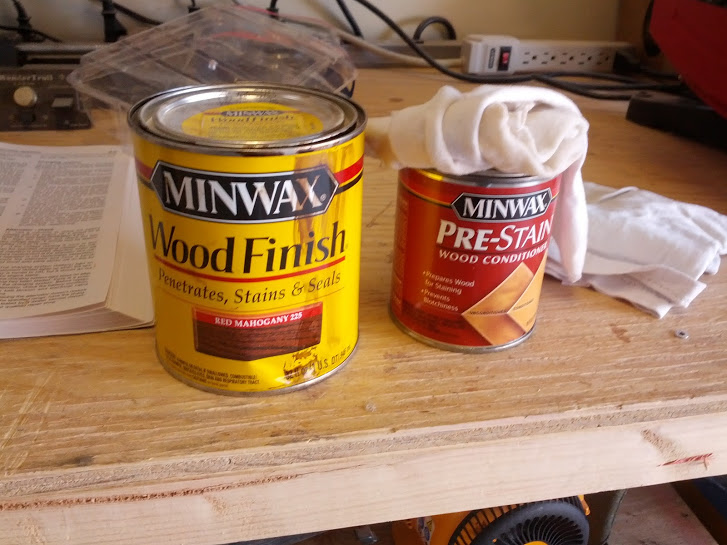
- Stain - Whatever color you please. I used a cherry stain (with pre-conditioner) and no poly to give it a more rustic look.
- Wood Glue/Gorilla Glue - Used to attach the studs together and glue in the dowels.
- Assorted Vices and Clamps - I used 3 36" sliding clamps, 2 60" sliding clamps, and an assortment of deep C clamps.
- Saw
- Rubber Mallet
- Sanding tools
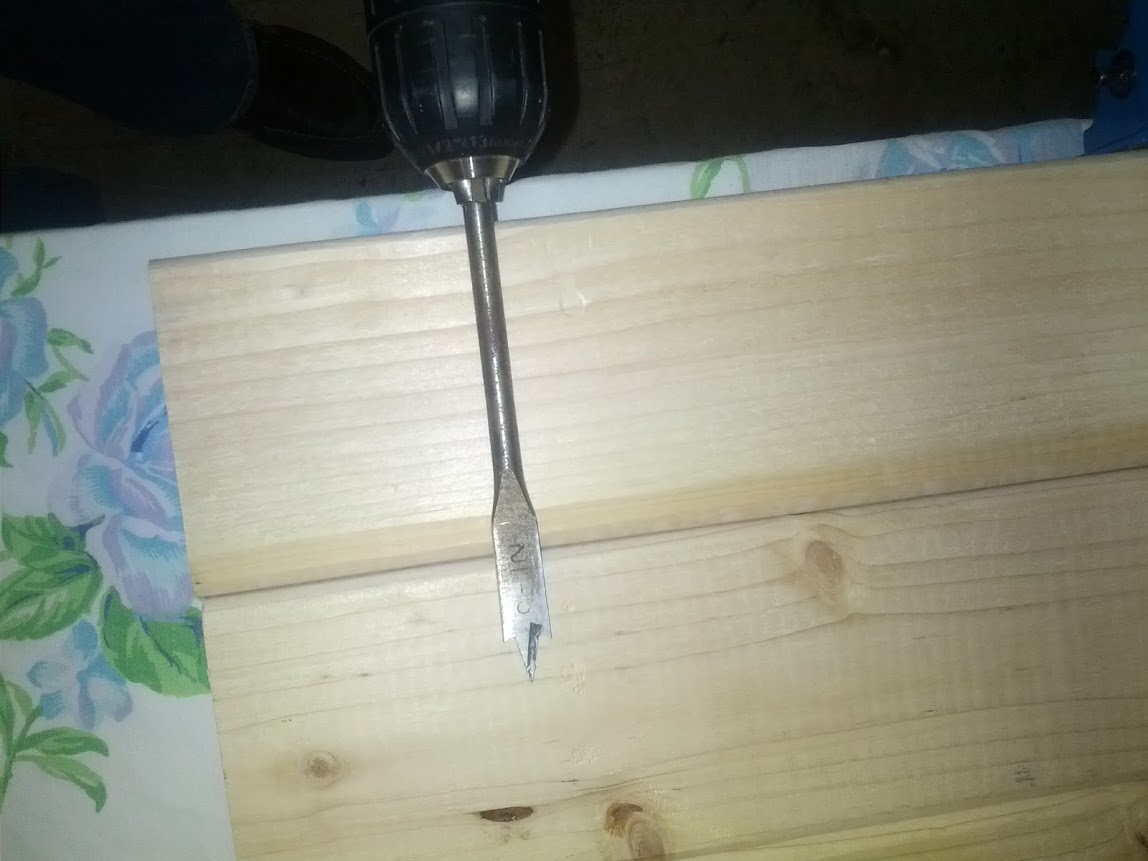
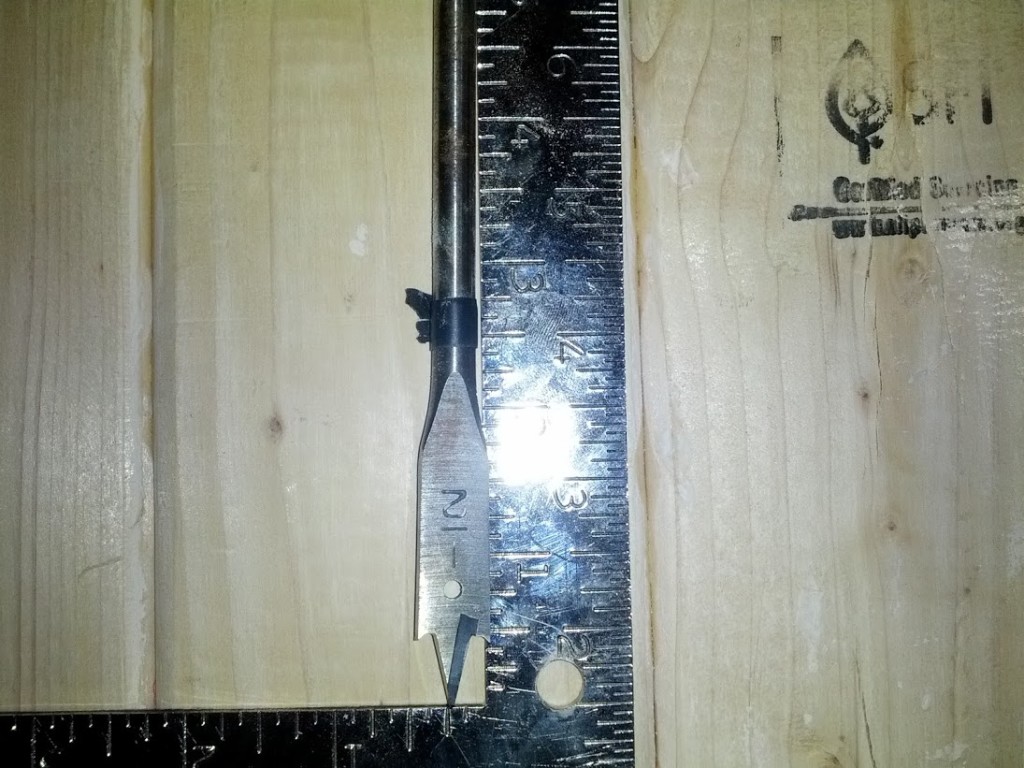
- Drill, 1/2" bit (long) and 1/4" bit (long)
Step 1: Cut the Boards
First thing we have to do is cut the boards that will end up being the top and bottom of the bench. I wanted my bench to be 48″ wide, so I cut a total of 6 48″ long 2×4 whitewood studs. 3 boards in parallel for the top, and 3 for the bottom.
For the sides, I wanted a bench that was ~18″ high. This is the uncompressed seat height of my couch, so I figured it’d be a good place to start for the bench. The actual dimensions of a 2×4 are more like 1.5×3.5, so accounting for the top and bottom dimensions, I’d need 15″ long sides to hit my 18″ goal (15″ side + 1.5″ thick bottom + 1.5″ thick top = 18″). So we need 6 15″ 2×4 whitewood studs for the sides.
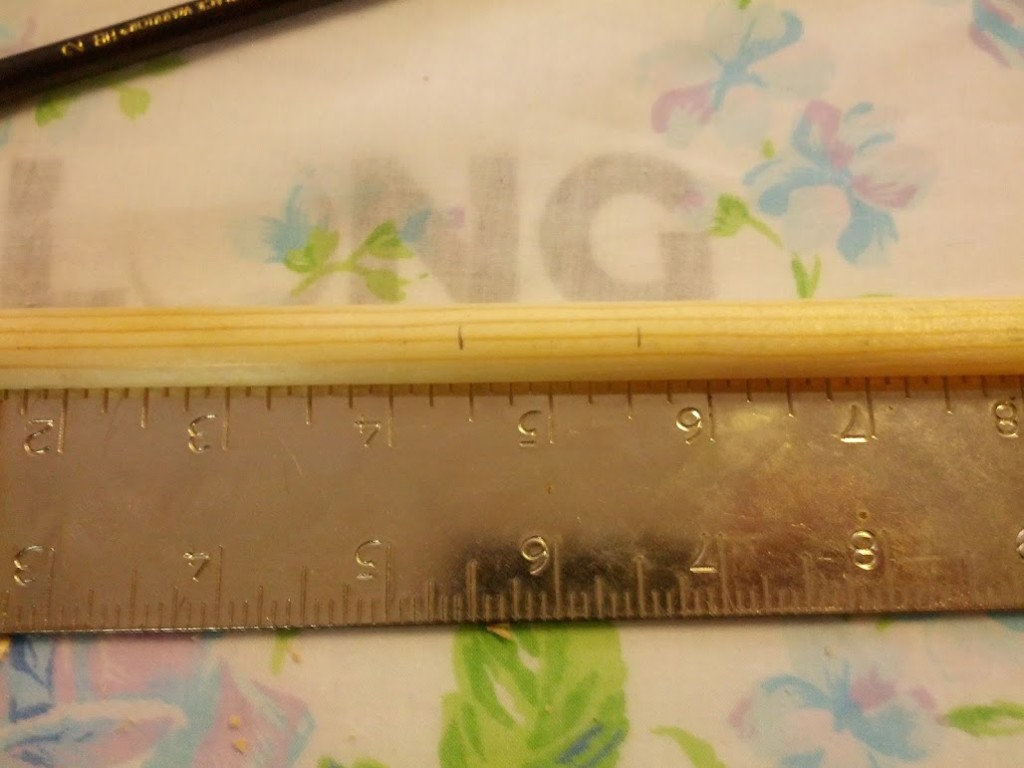
I used a power miter saw to cut my boards, but any saw will work. If the boards aren’t all exactly the same length, we can take care of that during sanding (as long as they are somewhat close).
Step 2: Assemble the Top/Bottom and Sides
Now that we have all the outer wood cut (6 48″ pieces for the top/bottom and 6 15″ pieces for the left and right sides), we need to assemble the four individual pieces. Lets start with the top/bottom.
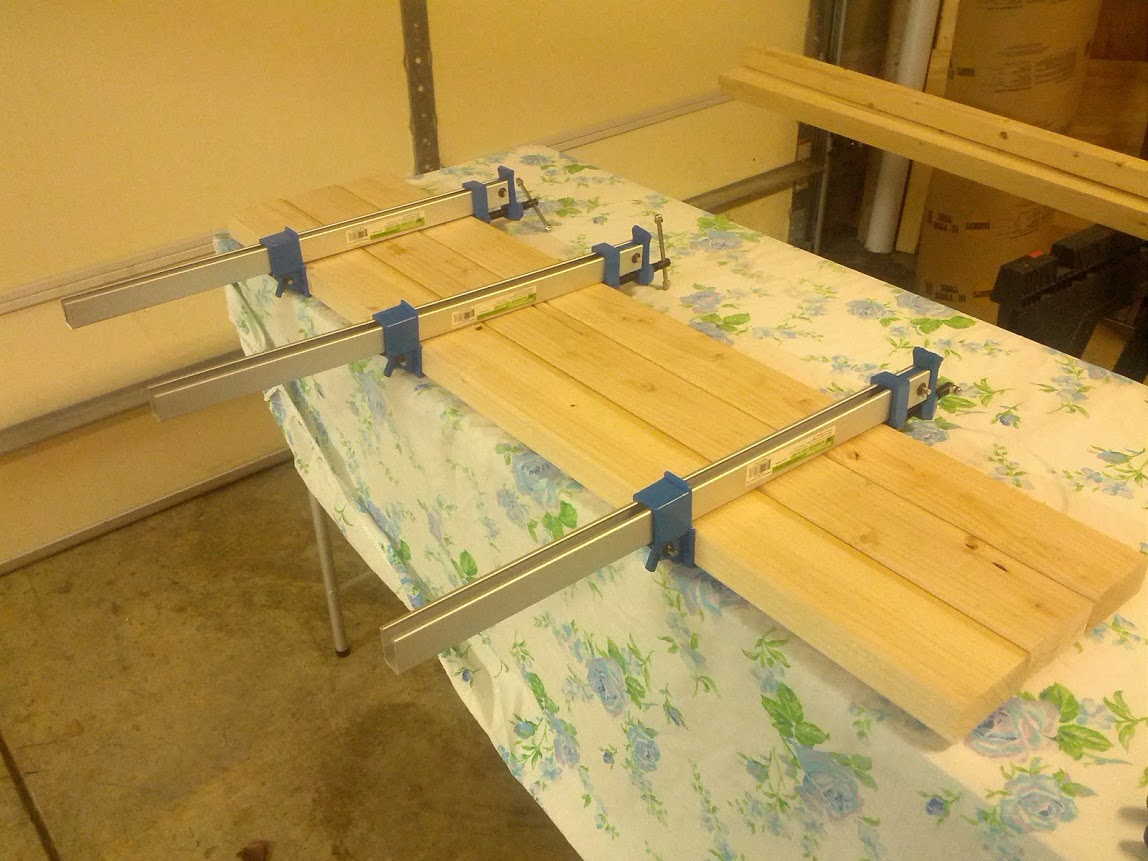
To keep this project 100% wood, we will be using dowels to attach the pieces together. This is where the vices will be absolutely necessary. Lay out 3 of the 48″ pieces in parallel and get them as even as possible. If there are blemishes you would rather not have on the outer face, make sure all the blemished faces all point the same direction. When the 3 pieces are even, use your vices to lock them in place with respect to each other.
Unless you have some special drill bit that will allow you to dowel all the way through the sides of 3 2×4′s, we’re going to create 4 dowel points. The dowel hole depth was about 4.5″ for me with my drill and 1/2″ hole bit. This was a little hard to conceptualize, so Steve made this cool ASCII art to illustrate:
      -->[ 1 ][ 2 ][ 3 ]<--
         [ 1 ][ 2 ][ 3 ]
         [ 1 ][ 2 ][ 3 ]
         [ 1 ][ 2 ][ 3 ]
         [ 1 ][ 2 ][ 3 ]
      -->[ 1 ][ 2 ][ 3 ]<--
This is from a top-down perspective. We will be drilling through the outer boards and partially into the middle board in 4 spots near the corners of the board. Here’s a close-up of how the dowels will actually be installed (level-side perspective):
[     1      ][     2      ][     3     ]
[------------][----    ----][-----------]
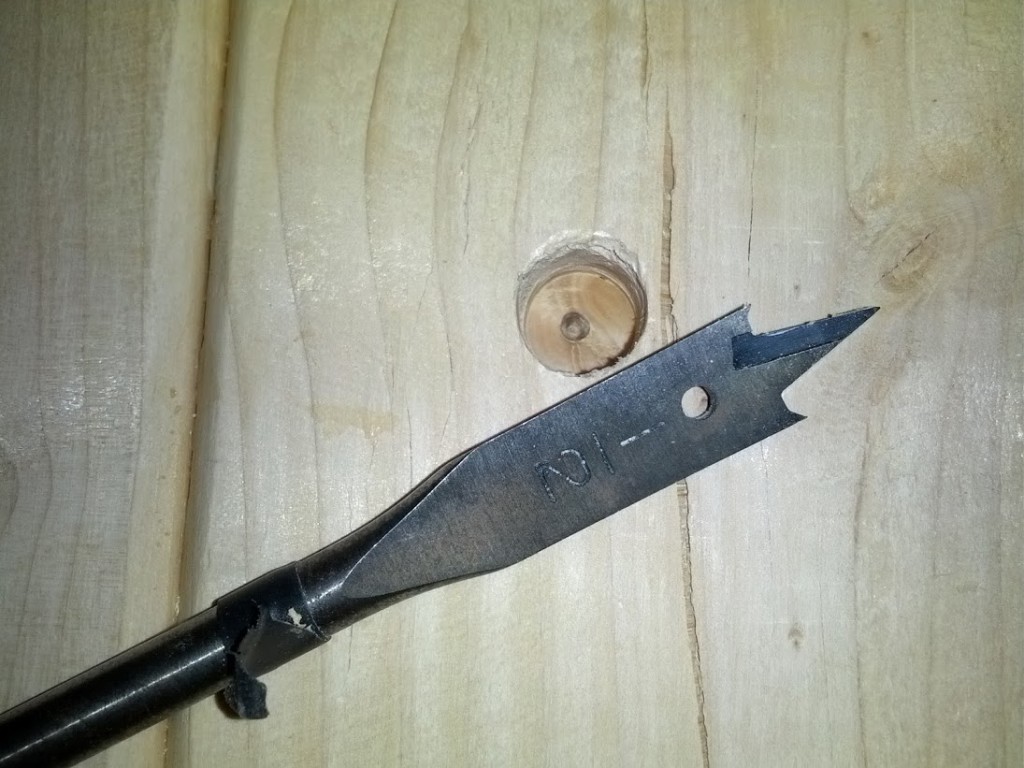
The biggest thing to remember is that as these are the top and bottom of the boards, we will definetely want to leave room for attaching the completed top/bottom to the sides, so the dowel points on these boards should NOT be all the way at the farthest edge of the board. I came in 4 inches from the ends of the board and made my holes. My poor drill battery could only stand about 1 hole before it needed a recharge. Some compressed air helps to get the sawdust out of the holes. Be sure to leave the boards clamped until all 4 holes are drilled.
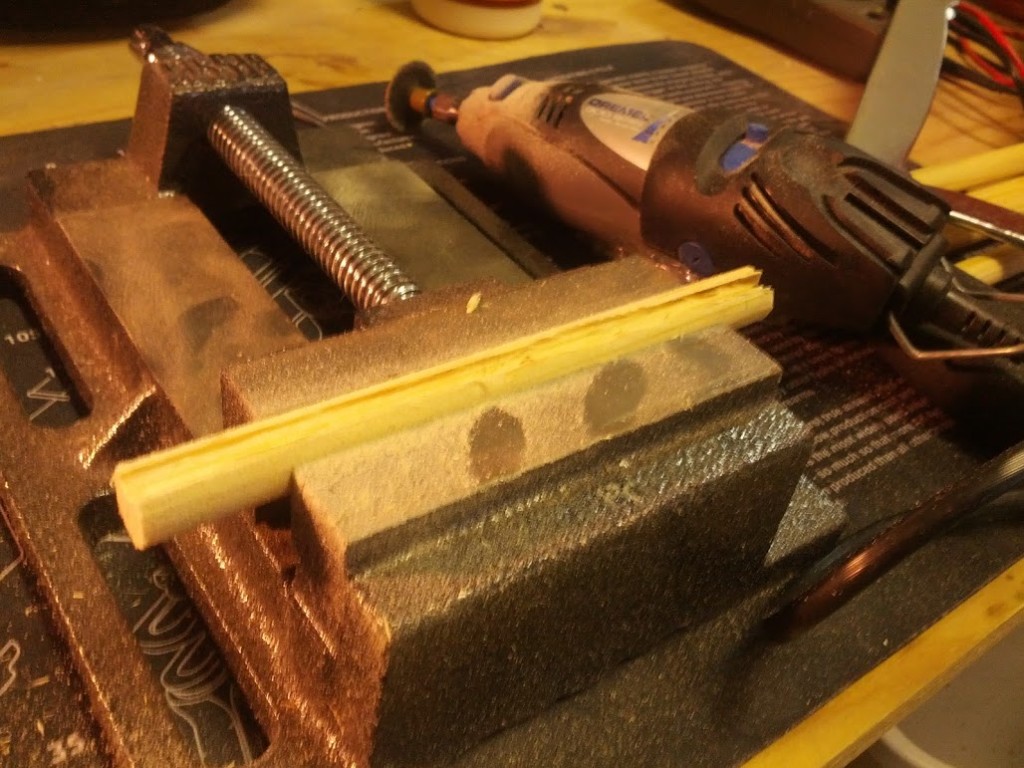
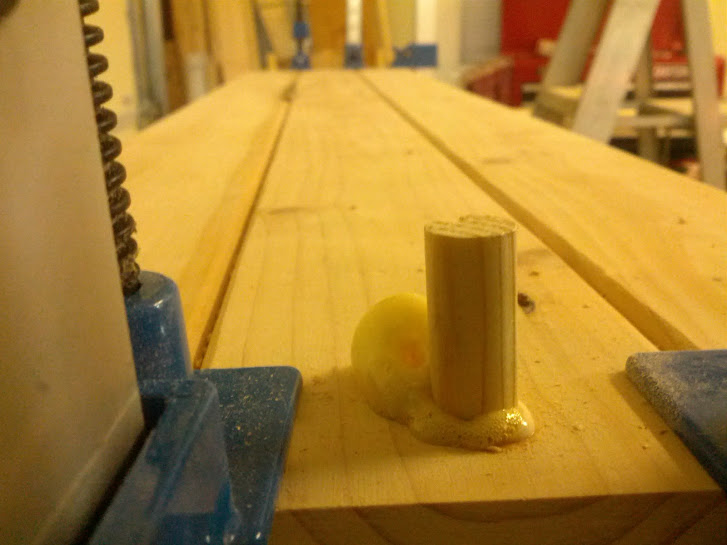
Once your 4 dowel holes are drilled (or while you’re waiting for your drill battery to recharge), we can move on to notching the dowels. This probably isn’t 100% necessary (Steve wishes he had done this but ended up not doing it). Notching allows space for excess glue to collect and provides a stronger bond between the dowel and the surrounding hole and minimizes and chances of splitting. There are several methods of cutting grooves into a dowel. You may even be able to find spiral grooved dowels. With my limited tools, I just used my Dremel and a cutting wheel to cut my grooves.
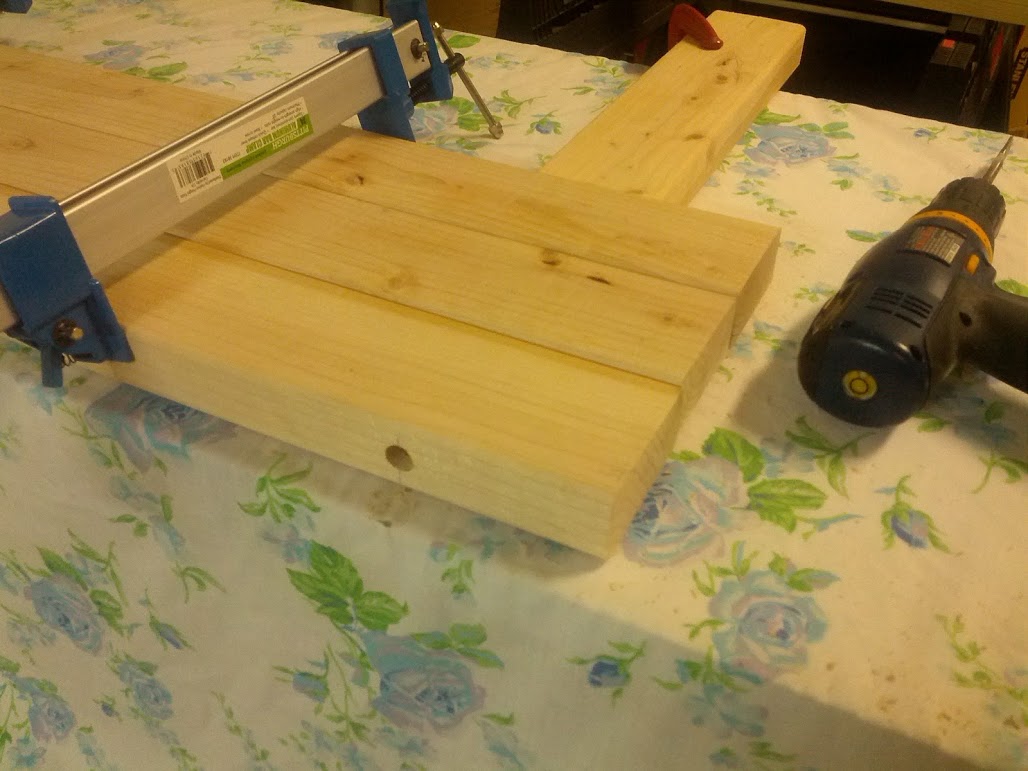

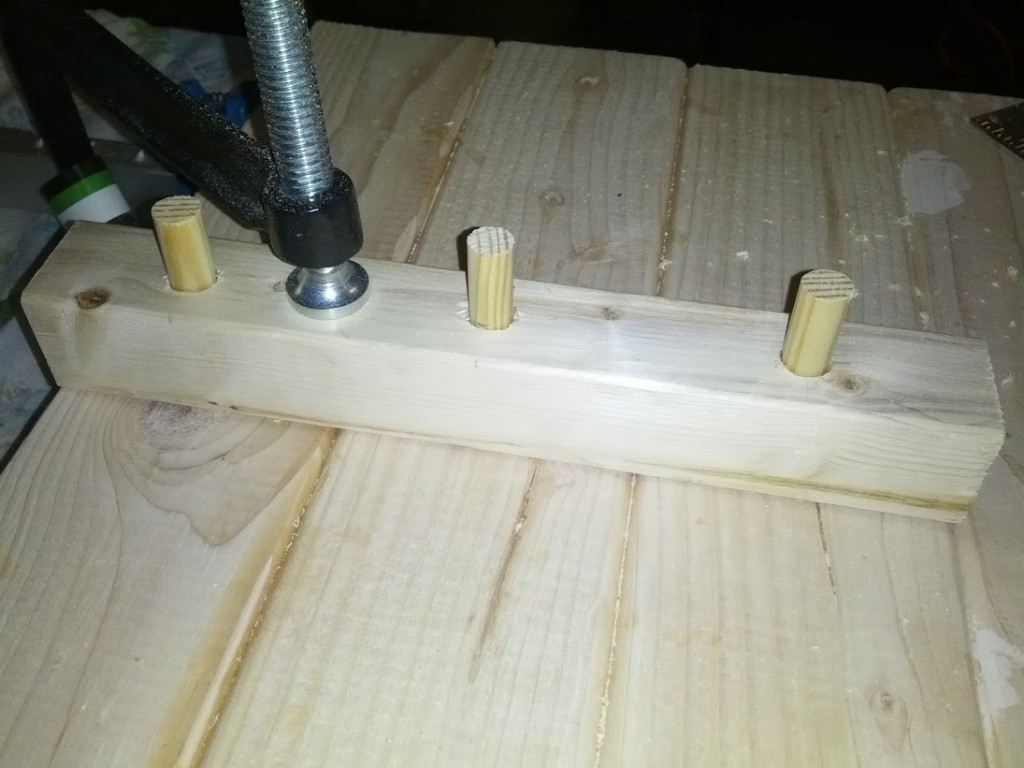
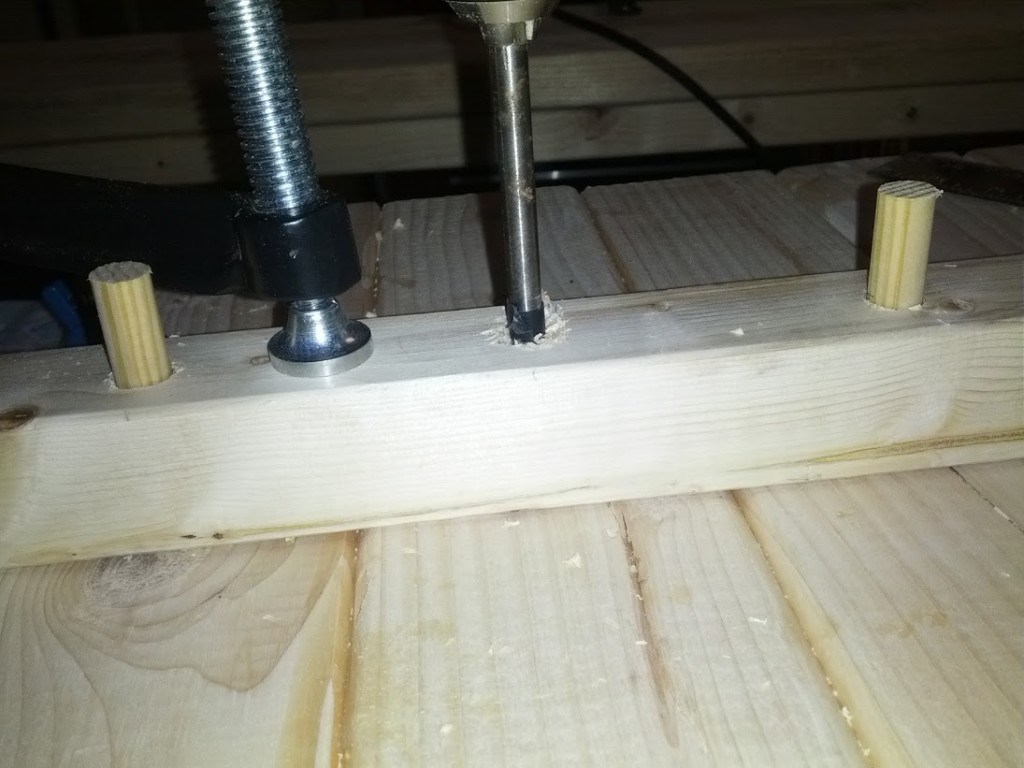
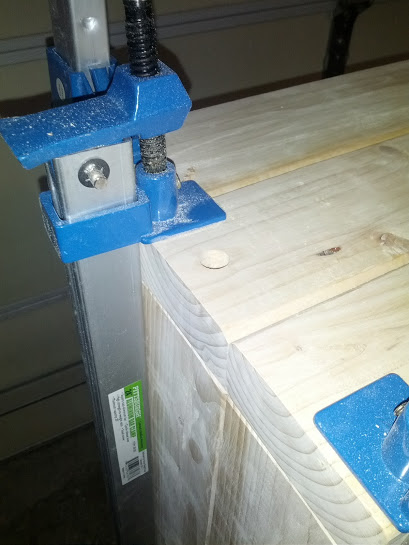
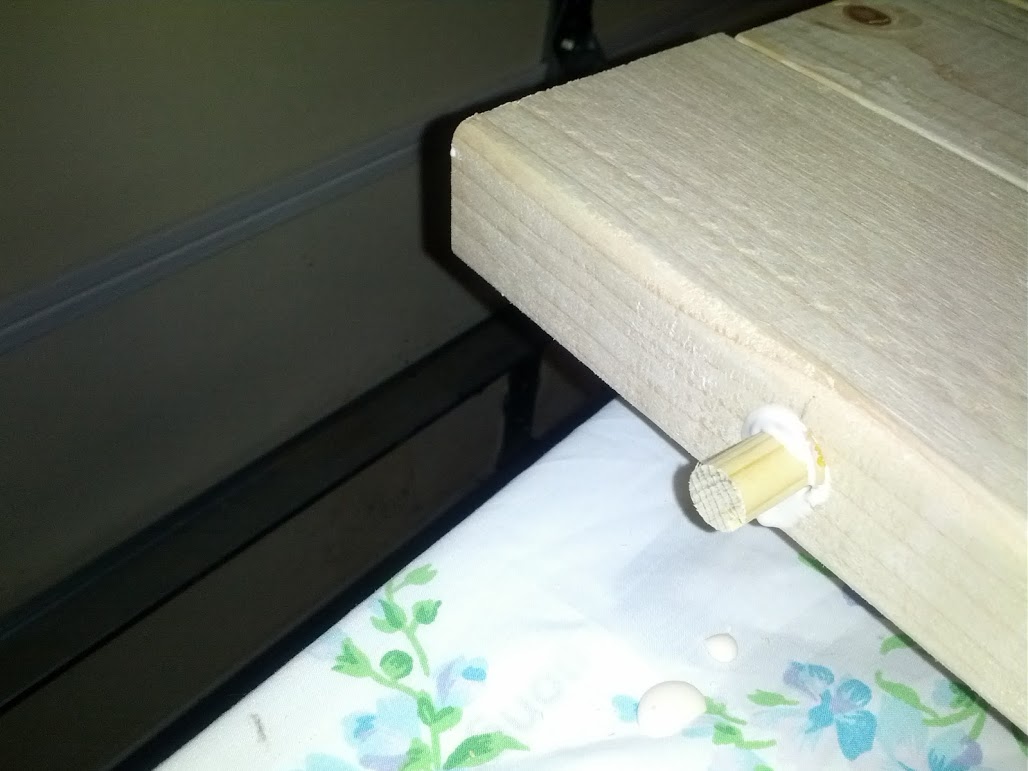
OK – dowels cut and (optionally) grooved, and all 4 holes drilled in the top/bottom piece we’ve started with. Now we get to break out the glue. Loosen the vices, put wood glue in between all the boards, line back up the ends and the holes, and re-apply the vices. I used one of the dowels to ensure I could reach all the way through the holes and made whatever adjustments were needed before really wrenching down the vices. Once you have the vices back in place with glue in between the boards, it’s time to glue up the dowels. I used Gorilla glue in the grooves and wood glue on the outer edge of the dowel. Then twist the dowels into each hole as far as they will go and use a rubber mallet to tap them in all the way. If you’ve lined the holes back up and have left a similar amount of excess dowel as I have, you should have a board that looks like this:

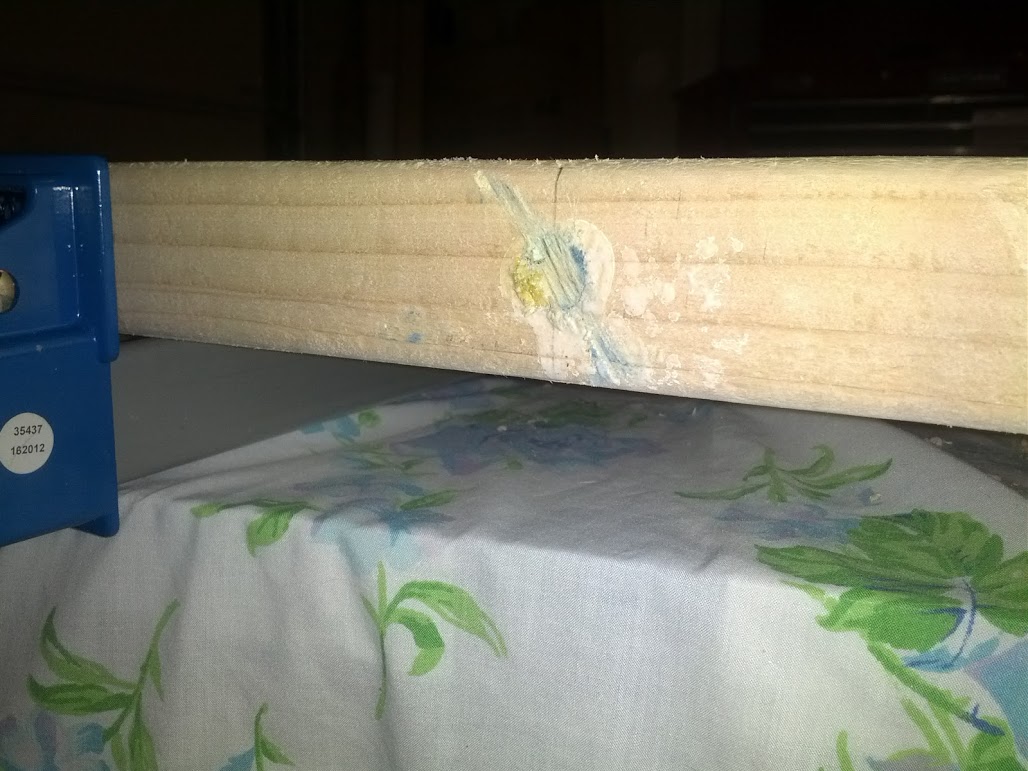
Do this for all 4 holes. Lastly, you can cut off the excess dowel before everything sets. Just BE CAREFUL not to mar the wood like I did. I used an unwieldy hacksaw and chewed into the side of the board by accident. I’ll correct this in the sanding process, but it’s better not to do this in the first place.
Nice, that’s one board down. Repeat once more for the bottom (or top). We’ll do an almost identical process for the 15″ sides. Line the boards up like before, vice them down, drill the dowel holes, make 4 dowels, then glue the boards together and attach with the glued dowels. The only real difference between the top/bottom and the sides is in the dowel hole placement. On the top/bottom I mentioned I drilled my holes 4 inches from the sides. For the left/right side pieces, I drilled my attachment holes 3.5 inches from the top/bottom. This was to account for the depth of the dowel that we will use to attach the sides to the top and bottom.
Step 3: Cut & Attach Shelf Supports
The shelf supports come from the 96″ 2×2 piece. I cut two ~10.5″ pieces to use as the supports.
The support was positioned so that it’s bottom edge was 5.25″ from the bottom edge of the side wall. Given a 15″ total inside height, I wanted the surface of the shelf to sit exactly in the middle of the space. So, given a 1.5″ actual thickness of the shelf support, and a .75″ thickness of the 1×4 that I’ll be using for the shelf itself, that’s 2.25″ worth of wood I have to account for. Half of 15″ is 7.5″, minus the 2.25″ dimension gives us the 5.25″ position of the bottom of the shelf bracket.
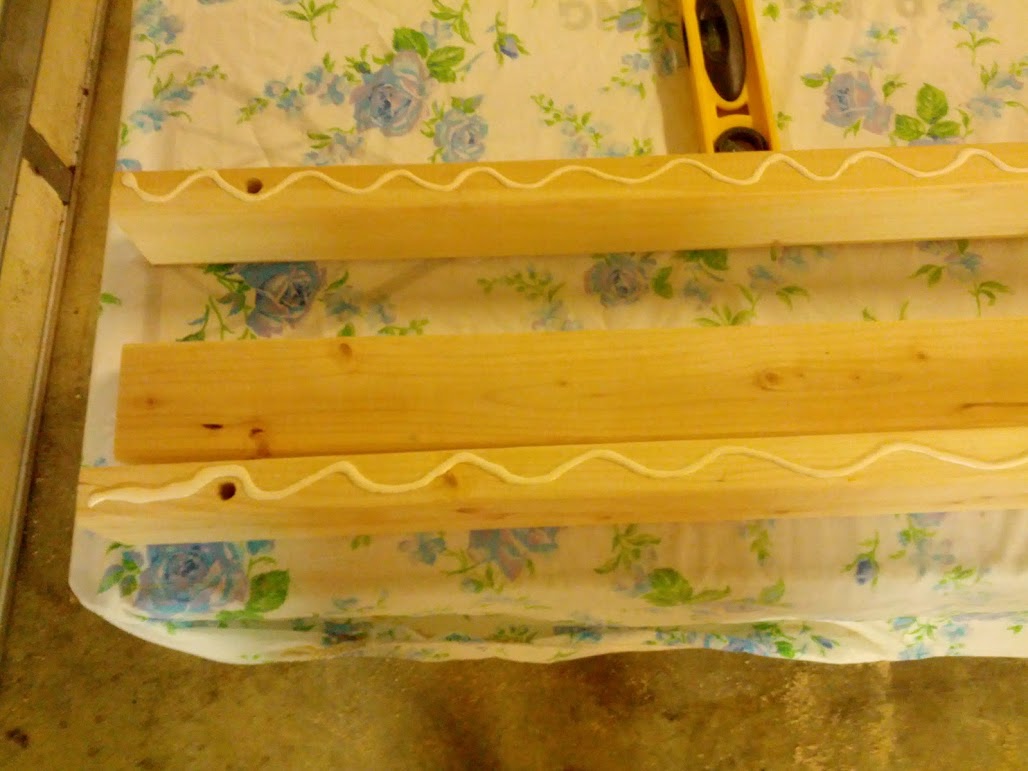
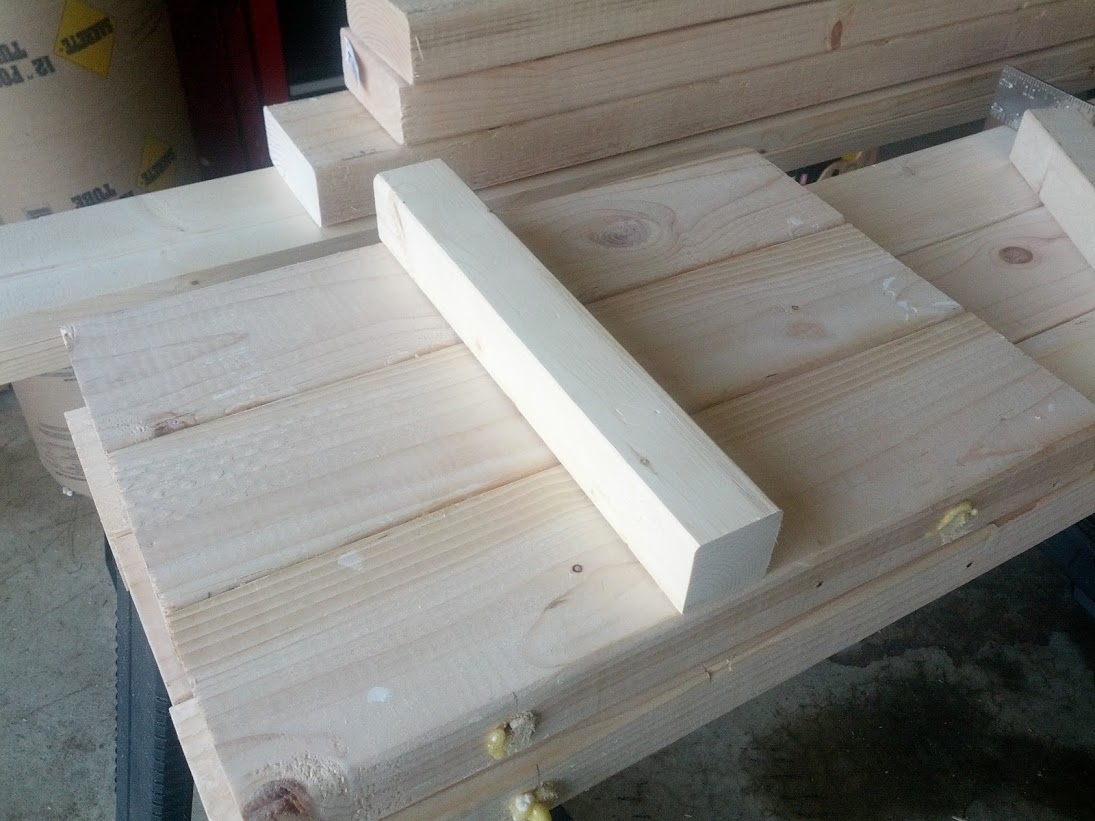
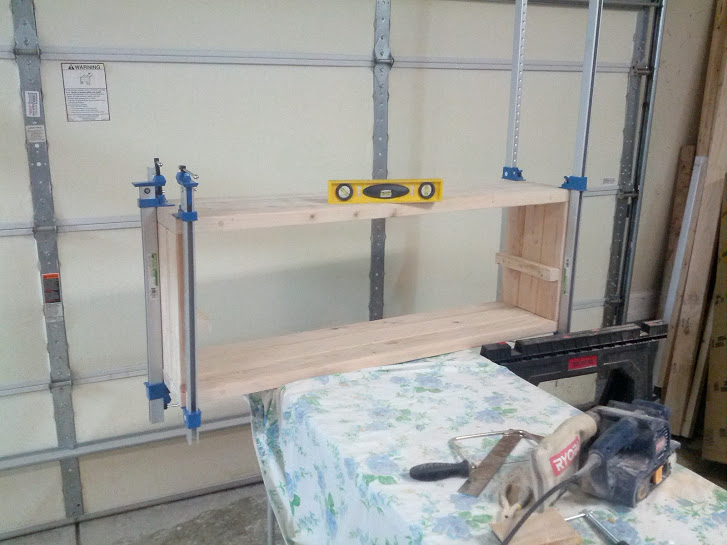
Before actually attaching the supports, I needed to file down the glue and dowels on the side walls. This allowed me to line up the sides next to each other to be sure the shelf supports are in line. I also needed to sand the ends of the sides to be sure they were both 15″ long all the way across. After I was satisfied with the shape of the shelves, I lined them up side-by-side in my pair of 60″ sliding clamps. I positioned the support where I wanted it and used an 8″ deepthroat clamp to hold the support in place while I drilled three holes. Note that these holes really should only be drilled to about 2.5″ deep. That’s 1.5″ to get through the support itself, with another 1″ into the side of the shoe rack. I made a little guide out of electrical tape for my spade bit to tell me when to stop. I later realized that a lot of my depth into the side wall was wasted by the center tooth of the bit. After the holes were all drilled, I deepened them using a regular 1/2″ twist bit to the point that the hole created by the center tooth of the spade was diminished. You *could* actually go all the way through, but I wanted a smooth side on my bench, so I elected for it to penetrate only part of the way through the side. Now just apply glue to the pegs and between the support and the wall and clamp for several hours until the glue has set. Then repeat for the other wall, making sure that the two supports are lined up appropriately.

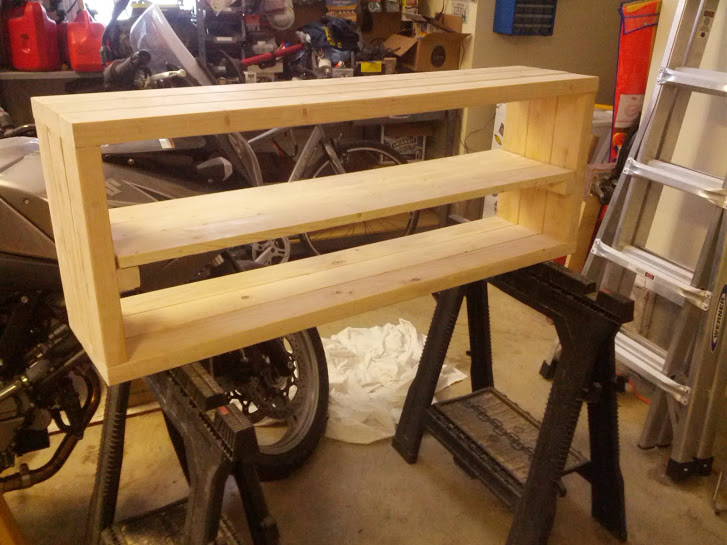
Step 4: First Sanding & Assembly
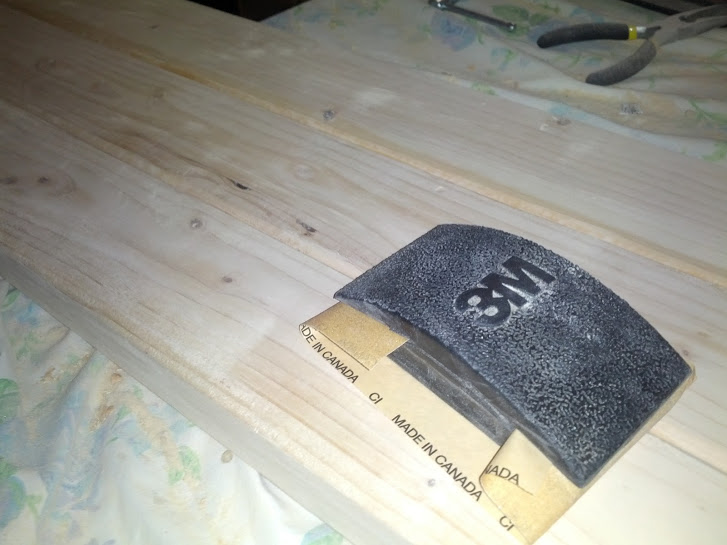
It’s easiest to sand everything once before all the pieces go together. This will really be helpful in preparing the shoe rack to be stained. I used a handheld belt sander and worked my way from 80 grit, to 120 grit, to 160 grit sandpaper. The 160 grit was used with a elbow-grease powered sanding block. Make sure to get any glue, markings, paint, and imperfections off of the outer facing sides of the shoe rack. Once you’re satisfied with the sanding, it’s time to start with assembling all the pieces.
Now we have all our individual pieces, ready to be put together! I had to use 4 – 5 sliding clamps in order to hold all the pieces in their final orientation while I drilled and glued the sides to the top and bottom. Once you have your pieces all aligned, it’s time to drill holed through the top/bottom and into the profile of the side for doweling them together. Be sure to measure your own dowel depth here. If you’ve been following my dimensions, you should be able to drill a 4″ deep hole through the top/bottom and into the side walls. Before you insert the dowels (but AFTER you’ve drilled all the holes), loosen the clamps and apply a layer of glue between the sides and the top/bottom. Then re-clamp and make sure all your holes still line up. Like before, it’s good to notch the dowels, apply gorilla/wood glue and mallet them all in.
Sliding clamps make it easy to hold everything together while drilling/glueing. Make sure to position the clamps so you can still drill the holes. If you have to move one, make sure the others will hold everything in place. Once the top/bottom is attached to the sides, saw off the excess dowels and let it dry.
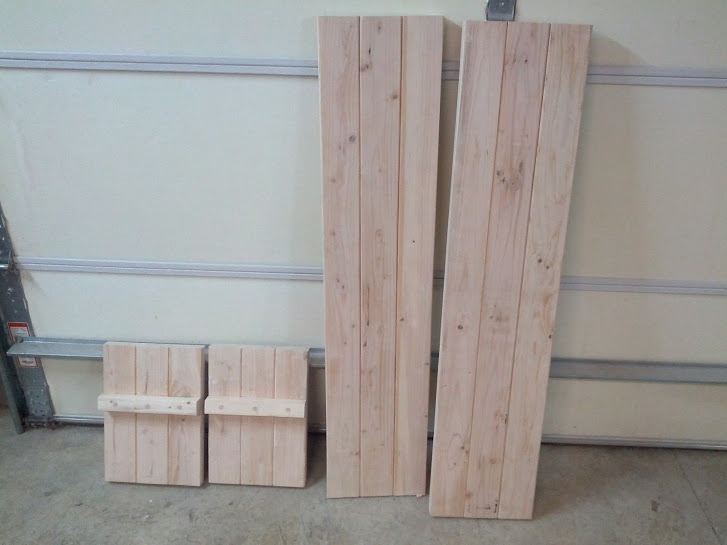
Once you finish attaching the first 4′ piece to the sides, flip it over, re clamp, and repeat for the other 4′ piece. Once all the glue has dried, you’re ready to create the shelf!
Step 5: Measure & Create the shelf
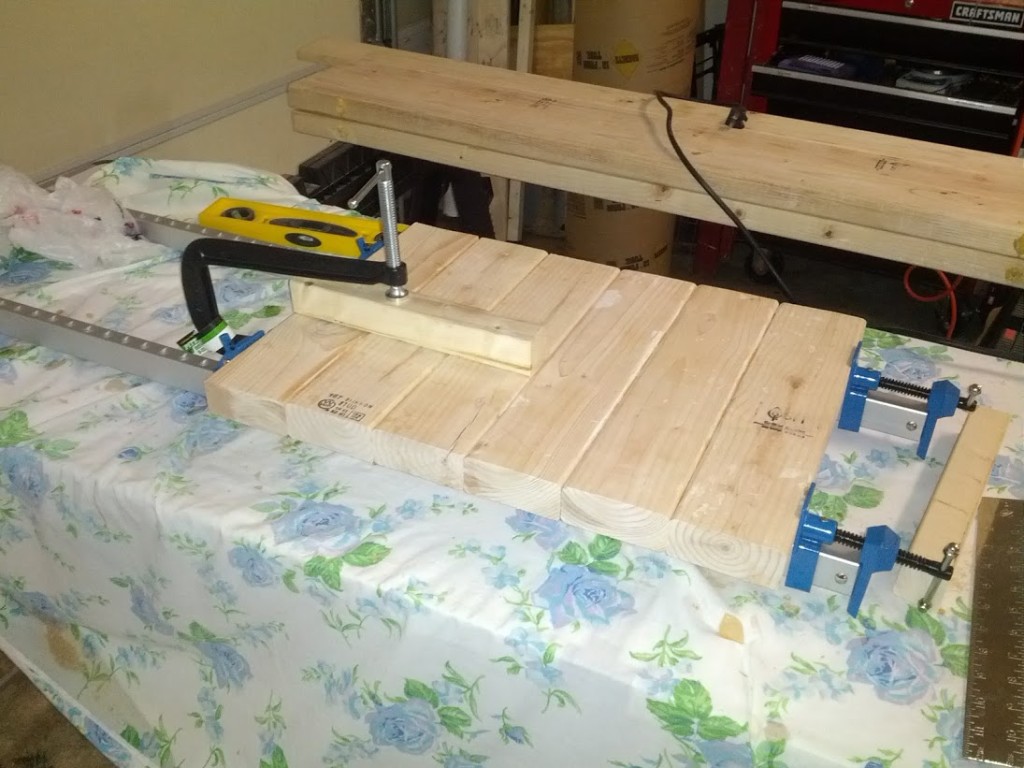
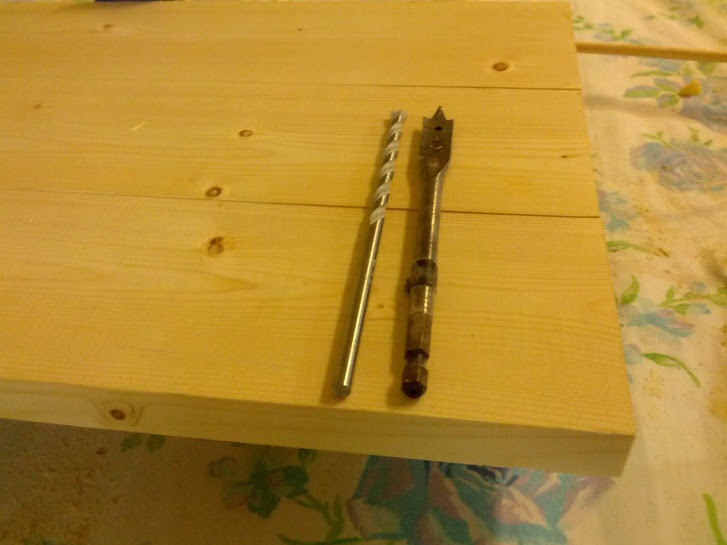
Once the pieces are all together we can measure the final dimension that will become our shelf. Your shelf may be a little different than mine depending on how tight/loose you want it to fit. My shelf ended up being 44.5″ wide. The shelf is created very similarly to the top/bottom sections. Using the 2 1x4x96″ hobby boards, cut three pieces to the total length of your shelf (so, in my case, 3 44.5″ pieces). Then, just like the top/bottom pieces, use sliding clamps to clamp all these together. Once aligned, use the long 1/4″ drill bit to drill the holes as deep as you can through the outer boards and into the inner board. I had to go get a special long 1/4″ bit, the standard one I had was not long enough to make it through the first board and sufficiently into the second. Take care with this portion, the small profile of the 1×4 makes it easy to pitch up/down and come through the top or the bottom of the boards. Once you’ve drilled all the holes, create the dowels from the 1/4″ dowel piece. I tried to notch these, but I’m not sure it did much good. It was much more difficult to get these dowels in due to their smaller size. After the dowels are ready, separate the boards, put glue in between, re-clamp, insert and hammer the dowels and wait for them to dry. Once dry, test to make sure your shelf fits how you want it.
Step 6: More Sanding & Stain
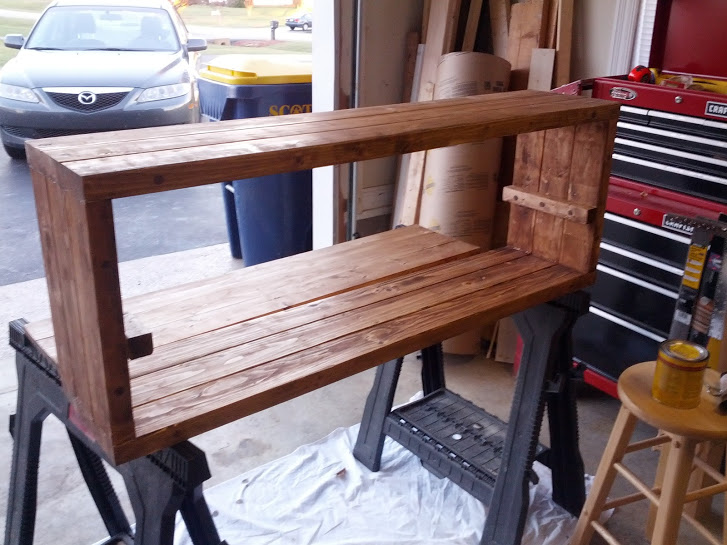
Now that everything is together, do any final sanding that needs done. It’s especially important to get excess glue off the boards. Once you’re satisfied with the sanding, get out a tack cloth or a damn cloth and wipe down the entire shelf, getting off excess wood dust. All that’s left now is to stain the rack and we’ll be done! I pre-conditioned the wood, wiping on the pre-conditioner with an old cotton t-shirt. This prepares the wood and helps it absorb the stain more evenly. After about 15 minutes, wipe any pre-conditioner off, and either immediately or within 2 hours of letting the conditioner absorb, you need to apply the first coat of stain. This was applied with a second old cotton t-shirt. Wipe on the stain, following the grain of the wood, and ensure it’s spread out evenly (no lines or darker spots). I stained all visible sides of the main unit and the middle shelf twice, and then flipped them both over to put a coat of pre-conditioner and stain on the bottom portions (which should really never be visible).
Final Thoughts:
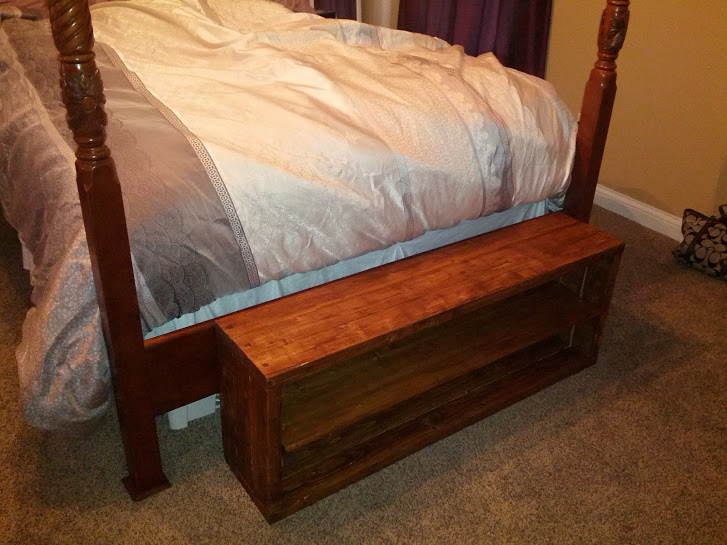
I’m pretty happy with the final result. There are a few things I might do differently next time, which is fine, because what’s the use of doing something yourself if you don’t walk away having learned something new? Although I like the height of the bench, my wife thought it looked a little short compared to the bed. It’s still the same height as our couch and is very comfortable to sit on, but I may take the final location into consideration if I were to do another one. From a cosmetic standpoint, I was unhappy with how the spaces between the wood were much lighter than the outer portions, due to the wood glue not absorbing the stain. After discussing this with my father-in-law, he told me that mixing some sawdust with the glue would allow it to keep its adhesive characteristic while also allowing it to absorb the stain color. I will definitely use this technique on my next wood project. In the end, I’m very happy with the bench. My wife and I can both sit on it and it feels sturdy as a rock. Hopefully you’ve enjoyed the how-to and can learn from my mistakes to build your own.